Note: This plugin has paid (premium) options, however we have tested this and the free version works perfectly well for basic SSO for any users in your Azure AD, including B2B Guests.
What is OAuth SSO?
Single Sign-On (SSO) is an authentication process in which a user is provided access to multiple applications/websites by using only one set of login credentials. OAuth is a Standard Authentication Protocol that uses Token-based authentication to facilitate Single Sign-On (SSO). OAuth allows third-party services to access end users’ information without sharing the end user’s login credentials with the Service Provider.
OAuth Authentication Protocol is suitable for both Web Browser and Mobile Applications and it is widely used for customer application and API access. It uses JSON to transfer messages between applications & uses HTTP for requesting and receiving tokens.
Why Add OAuth Single Sign-On to WordPress?
Now that you know about OAuth SSO let’s understand its importance for your WordPress website.
With the OAuth Single Sign-On Plugin in WordPress, users can quickly and securely login to your WordPress Website without having to remember their username and password. WordPress SSO can be integrated with Azure AD, Azure B2C, Discord, WHMCS, AWS Cognito, Keycloak, Okta, Clever, Salesforce, WordPress and any other OAuth & OpenID Connect Identity Provider. It acts as a Service provider to establish a trust between IDP to perform SSO authentication and login to WordPress using OAuth & OpenID Connect.
Single Sign-On is popular among organizations because it makes it easy to manage & create new users. Let’s understand this with an example.
Consider you have a WordPress website and your end users are stored in the Azure Active Directory (AD), now with the OAuth Single Sign-On solution, the users can login into your WordPress website using their Azure AD credentials using the OAuth Client Plugin. Using SSO you are delegating authentication, the responsibility of verifying the user’s credentials (such as username and password) is delegated to Azure AD so you can get users logged in to your website without worrying about the authentication process. Hence, the user can login and access any WordPress website integrated with SSO once he is authenticated.
How to enable WordPress Single Sign-On (SSO)?
Pre-requisites : Download And Installation
- Log into your WordPress instance as an admin.
- Go to the WordPress Dashboard -> Plugins and click on Add New.
- Search for a WordPress OAuth Single Sign-On (SSO) plugin or click here and click on Install Now.
- Once installed click on Activate.
Enable WordPress Single Sign-On (SSO) in your site using our WordPress SSO plugin and connect it to any Identity Provider
The miniOrange WordPress Single Sign-On (OAuth Client) Plugin supports integrations with different CMS & LMS like LearnDash, LearnPress, BuddyPress, Discord, MemberPress, TutorLMS, Sensei, LifterLMS and many more. You can integrate Single Sign-On with any community platforms or other CMS like Shopify, Joomla, Thinkific etc using our SSO Plugin.
Steps to configure Azure AD Single Sign-On (SSO) Login into WordPress
1. Setup Azure Active Directory as OAuth Provider
- Sign in to Azure portal (https://portal.azure.com).
- Click on App Services and go to Manage Azure Active Directory.
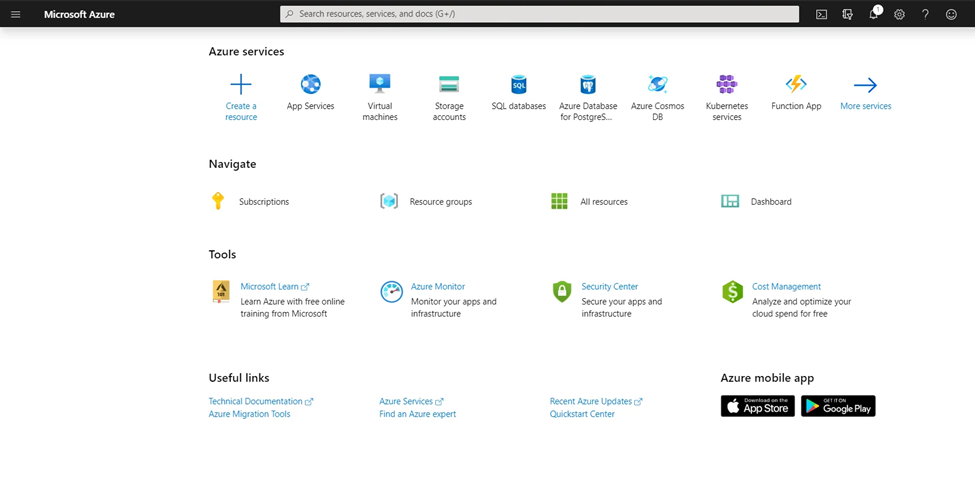
- In the left-hand navigation pane, click the App registrations service, and click New registration.
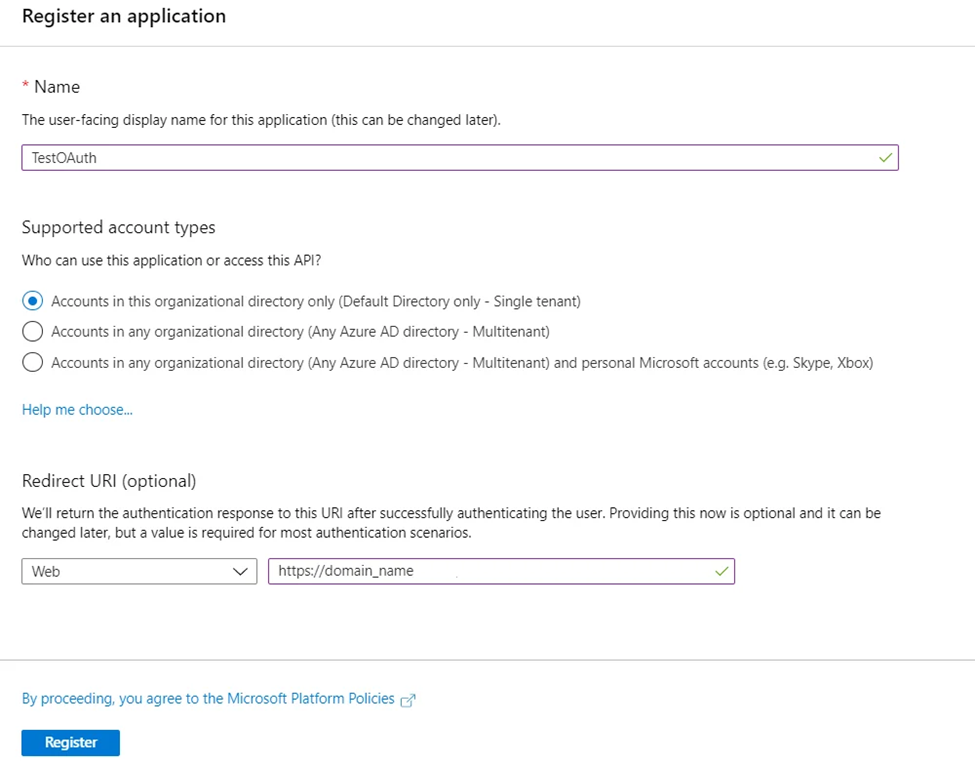
- When the Create page appears, enter your application’s registration information:
| Name : | Name of your application. |
| Application type : | Select “Web app / API” for client applications and resource/API applications that are installed on a secure server. This setting is used for OAuth confidential web clients and public user-agent-based clients. The same application can also expose both a client and resource/API. |
| Sign-on URL : | For “Web app / API” applications, provide the base URL of your app. eg, https://<domain-name> for a WordPress blog. Users would use this URL to sign in to a web client application. |
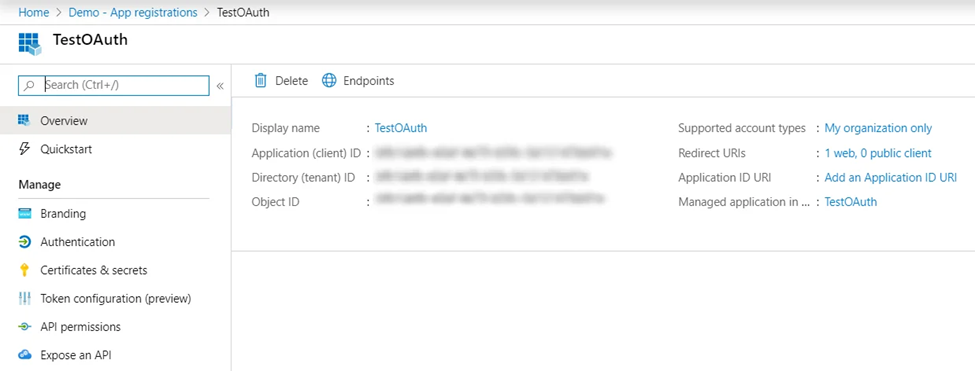
- When finished, click Register. Azure AD assigns a unique Application ID to your application. Copy Application ID and the Directory ID, this will be your Client ID and Tenant ID.
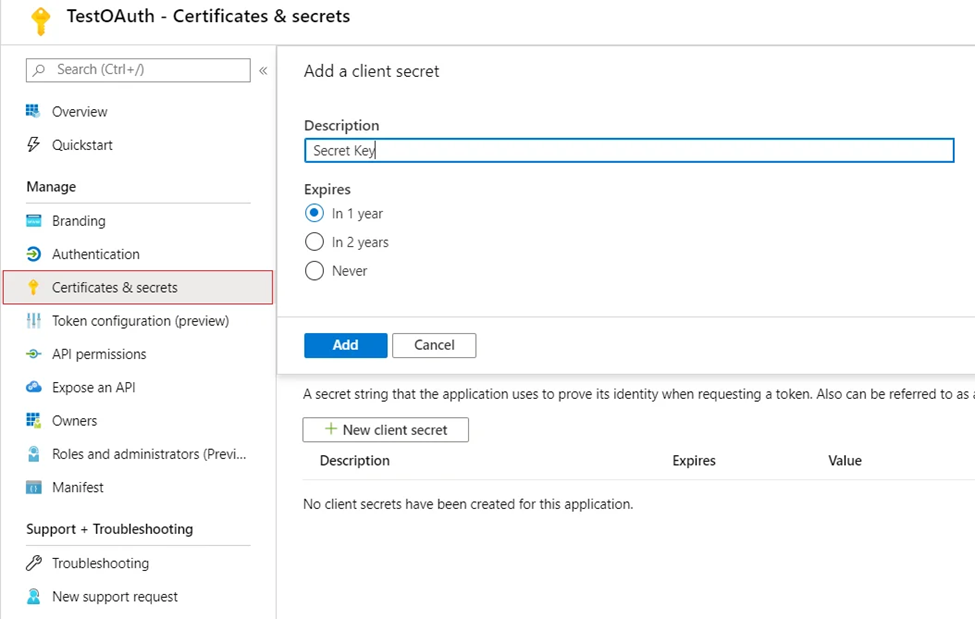
- Go to Certificates and Secrets from the left navigation pane and click on New Client Secret. Enter description and expiration time and click on ADD option.
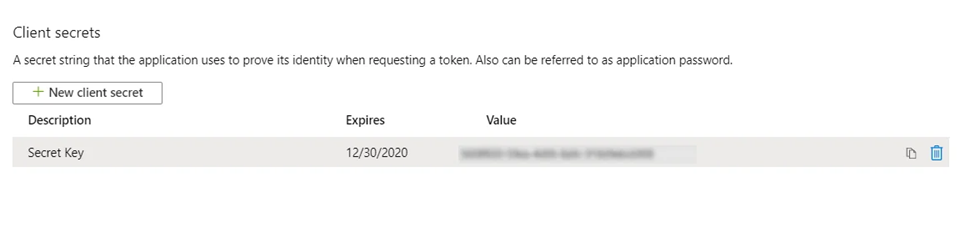
- Copy value. This will be your Secret key. Note that you only have one chance to copy this.
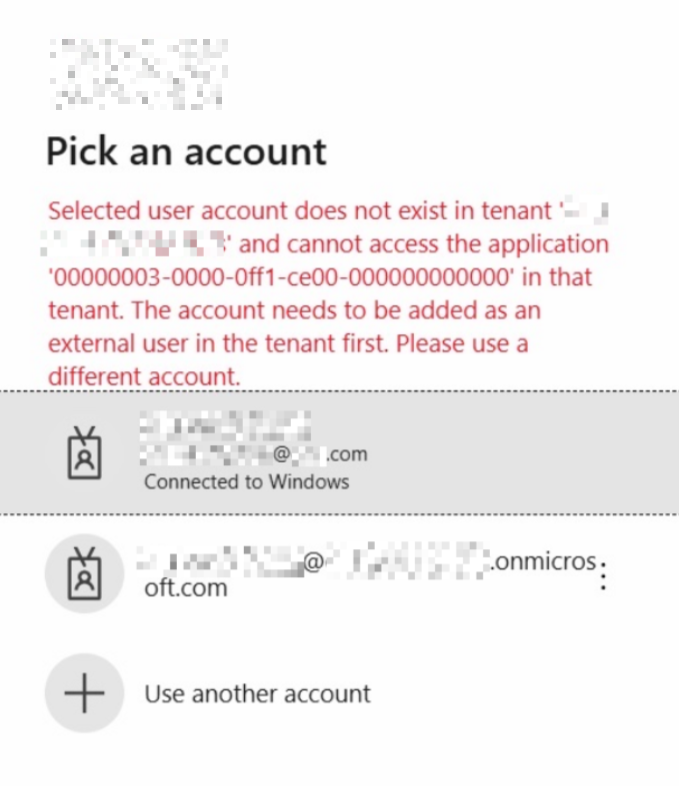
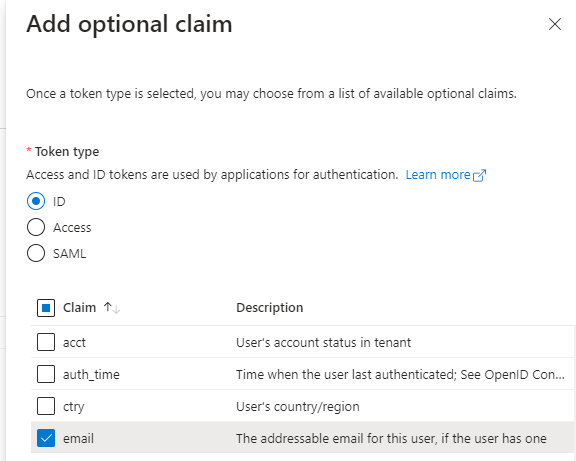
- Click Token configuration > Add optional claim > ID (not SAML since this is for OAUTH) and choose email. This is because email won’t be sent for normal Azure AD users, but by adding this email will be present for both Guests and internal AAD users, so means you can allow Guests to sign in simply by inviting them to your tenant.
You have successfully configured Azure AD as OAuth Provider for achieving user authentication with Azure AD Single Sign-On (SSO) login into your WordPress Site.
2. Setup WordPress as OAuth Client
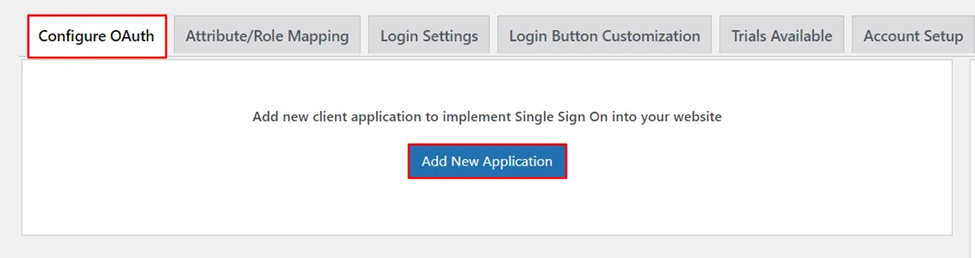
- Go to Configure OAuth tab and click Add New Application to add a new client application to your website.
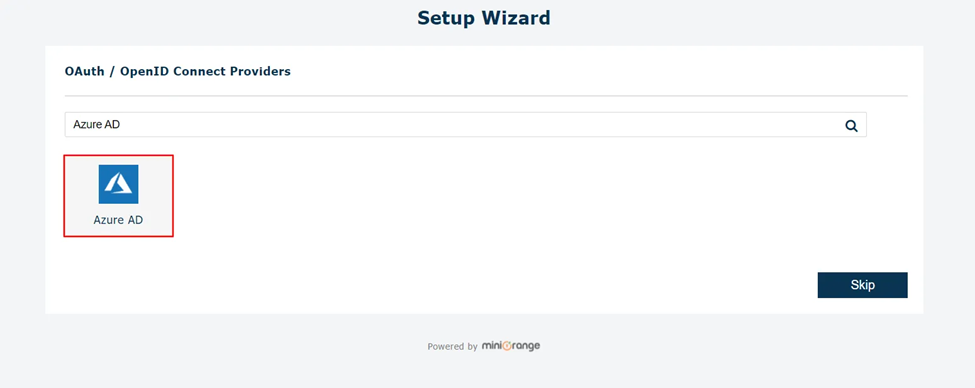
Choose your Application from the list of OAuth / OpenID Connect Providers, Here Azure AD.
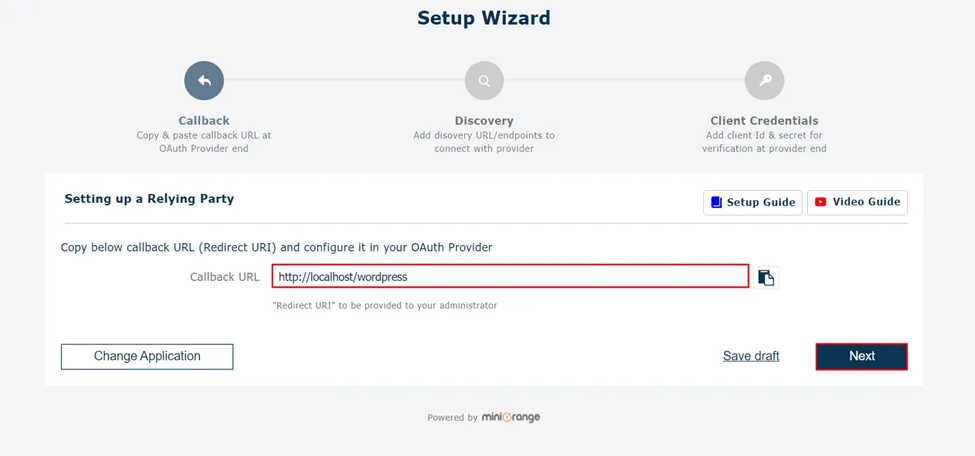
- Copy the Callback URL to be used in OAuth Provider Configuration. This will be your domain name. Click Next.
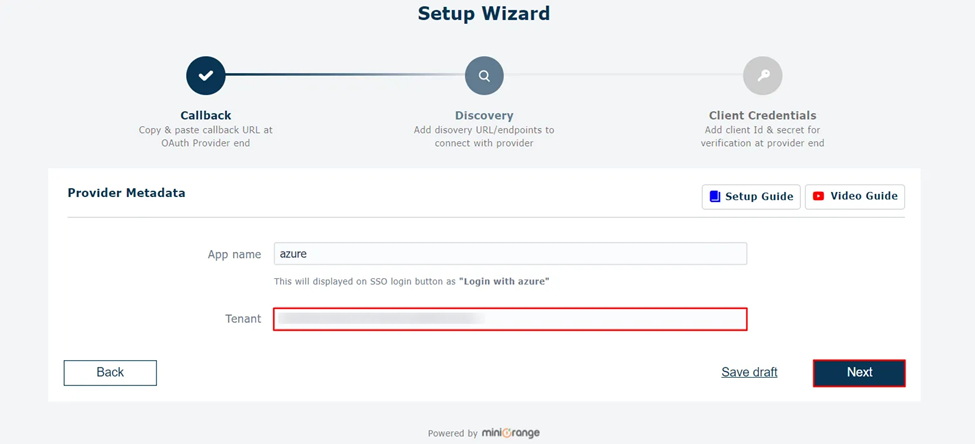
- Configure App name (use ‘Azure AD’) & Tenant ID found from the Azure Active Directory SSO application. Click Next.
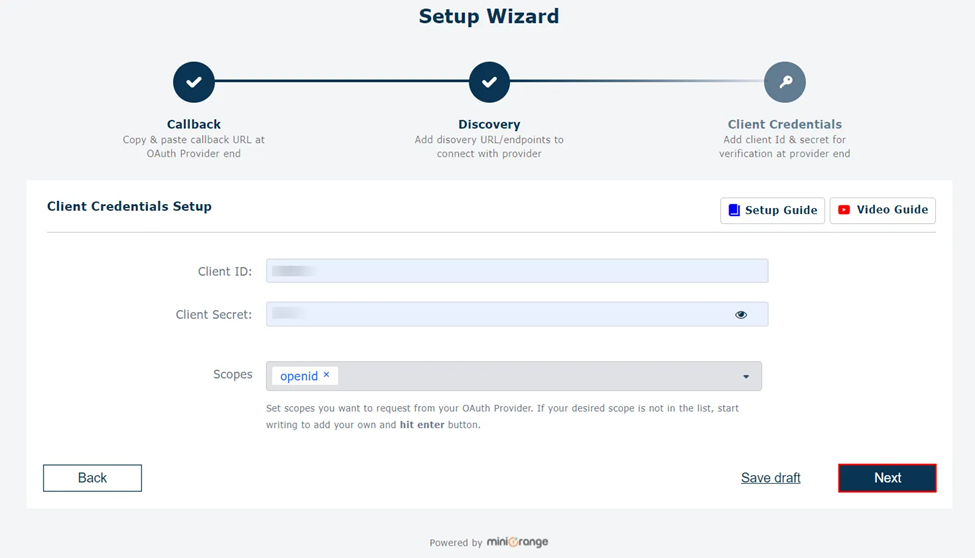
- Client Credentials like Client ID & Client Secret is shown in the setup dialogue box, openid is already filled. Click Next.
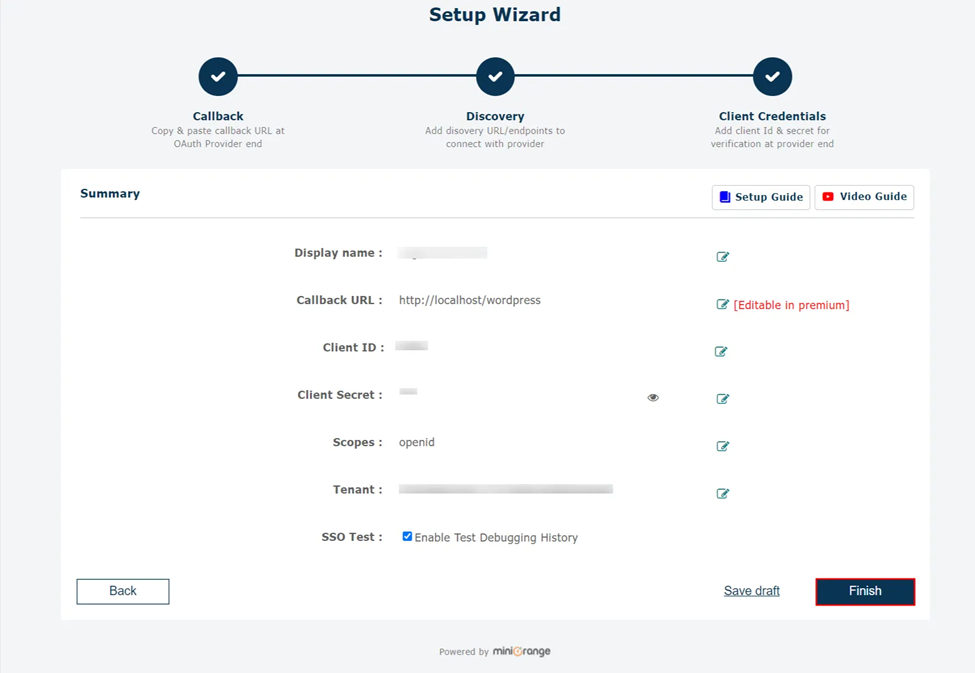
- Click on Finish to save the configuration.
You have successfully configured WordPress as OAuth Client for achieving user authentication with Azure AD Single Sign-On (SSO) login into your WordPress Site.
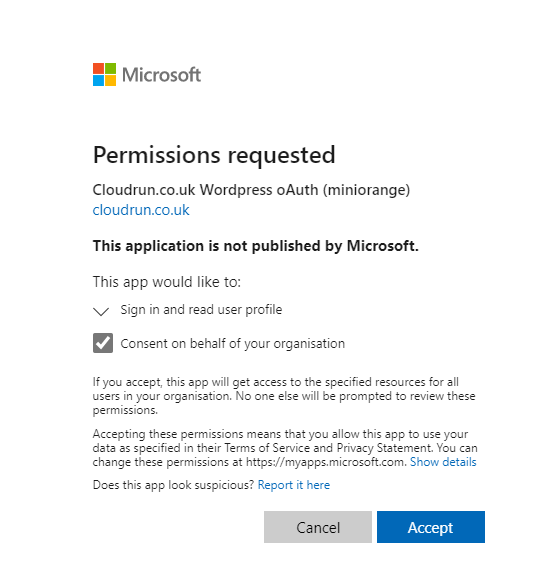
Click Finish, they app the app permissions:
3. User Attribute Mapping
- User Attribute Mapping is mandatory for enabling users to successfully login into WordPress. We will be setting up user profile attributes for WordPress using below settings.
Finding user attributes
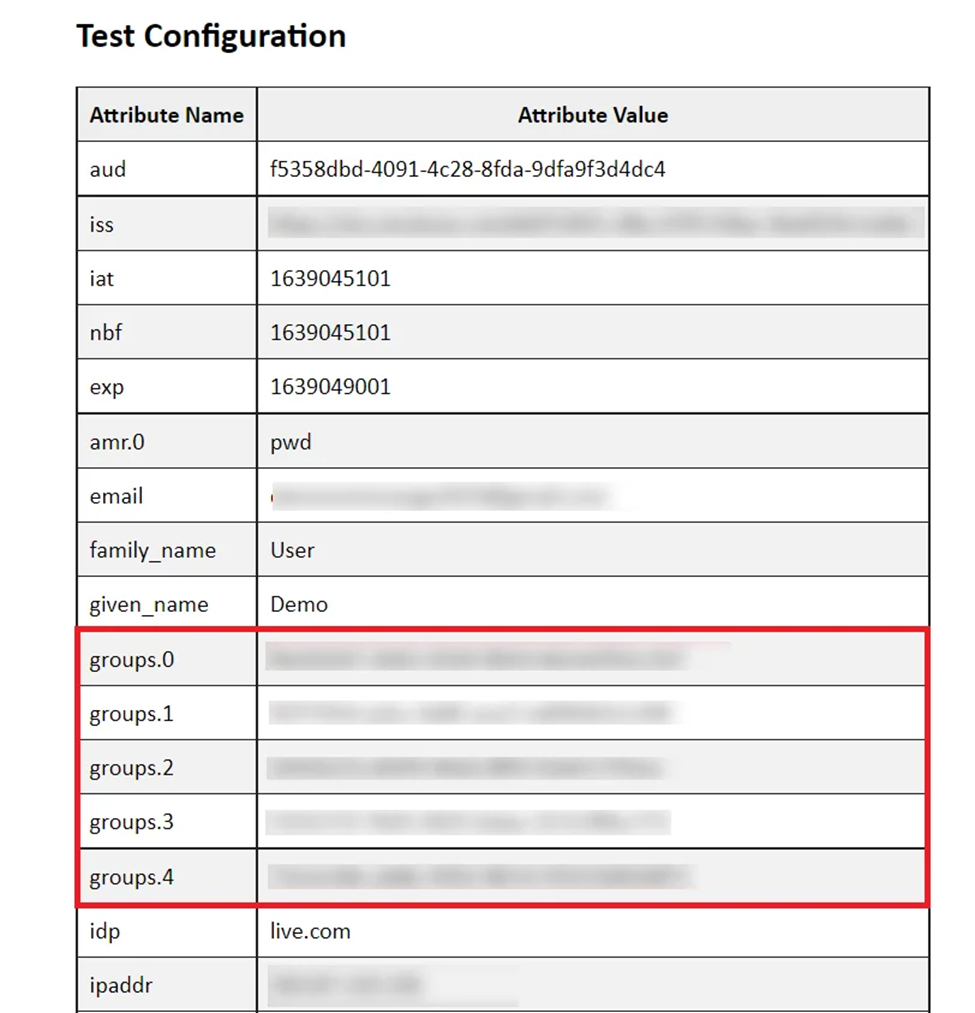
- Go to Configure OAuth tab. Scroll down and click on Test Configuration.

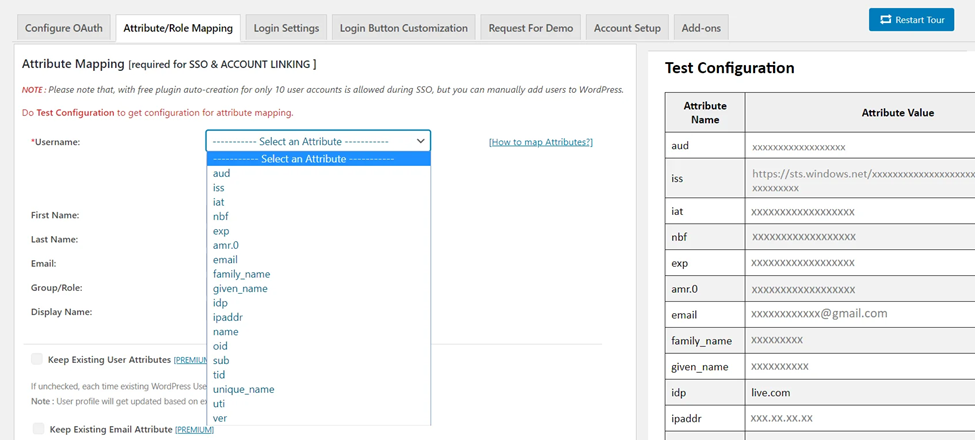
- You will see all the values returned by your OAuth Provider to WordPress in a table. Make sure you see email in the list, since we added this to the SAML token earlier.
- Once you see all the values in Test Configuration, go to Attribute / Role Mapping tab, you will get the list of attributes in a Username dropdown. In our testing, unique_name is the best attribute to use, and works with both Guests and normal users in your AAD tenant. Email should work as well, but for some reason we found that email didn’t always work with normal users.
That’s all you need to get SSO login working! The following sections are optional.
Azure AD Group Mapping
- Go to Application → Select the application where you want to configure the group mapping. Now, Go to the API Permissions tab.
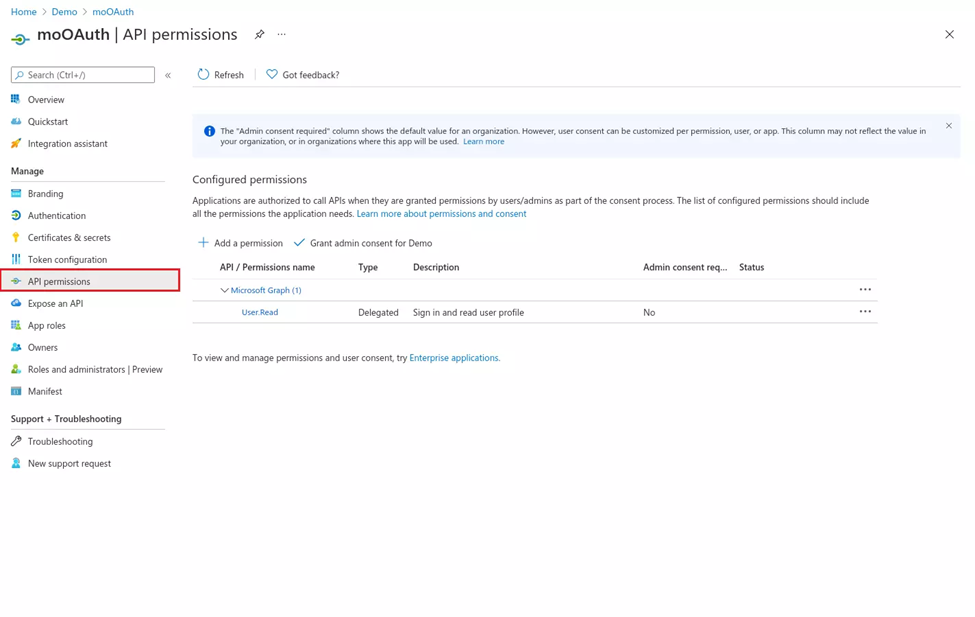
- Click on the Add permission button, and then Microsoft Graph API -> Delegated Permissions and select openid, Profile scope and click on the Add Permissions button.

- Click on the Grant consent for Demo button.
- Go to Manifest tab and find groupMembershipClaims and changes it’s value to “All” and click on the save button.
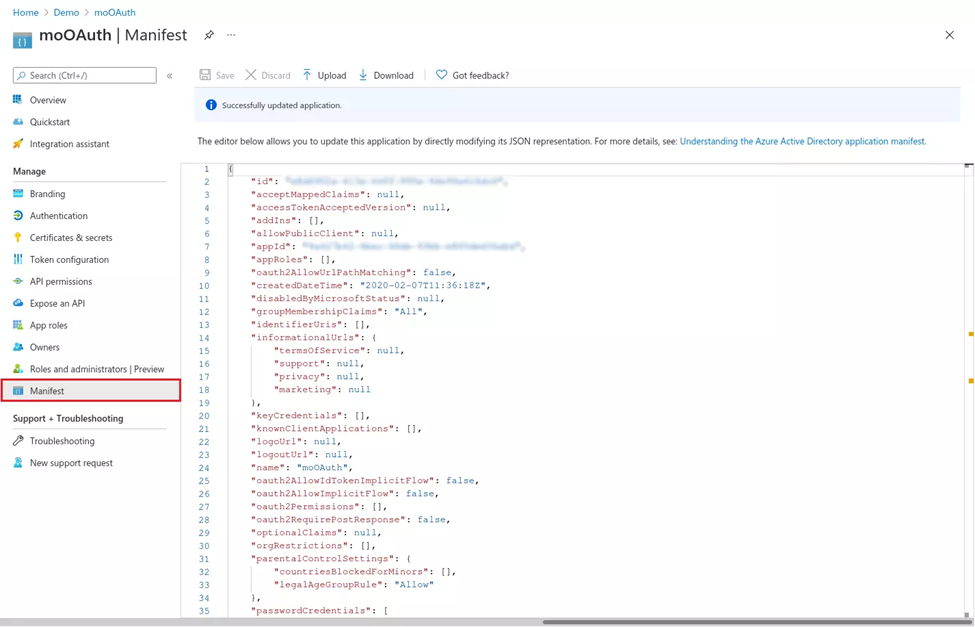
- Now you would be able to get the group’s value in the Test configuration window.
- You can follow the role mapping section to map the groups to WordPress users while Azure AD SSO.
5. Role & Group Mapping [Premium]
- Click on “Test Configuration” and you will get the list of Attribute Names and Attribute Values that are sent by your OAuth provider.
- From the Test Configuration window, map the Attribute Names in the Attribute Mapping section of the plugin. Refer to the screenshot for more details.
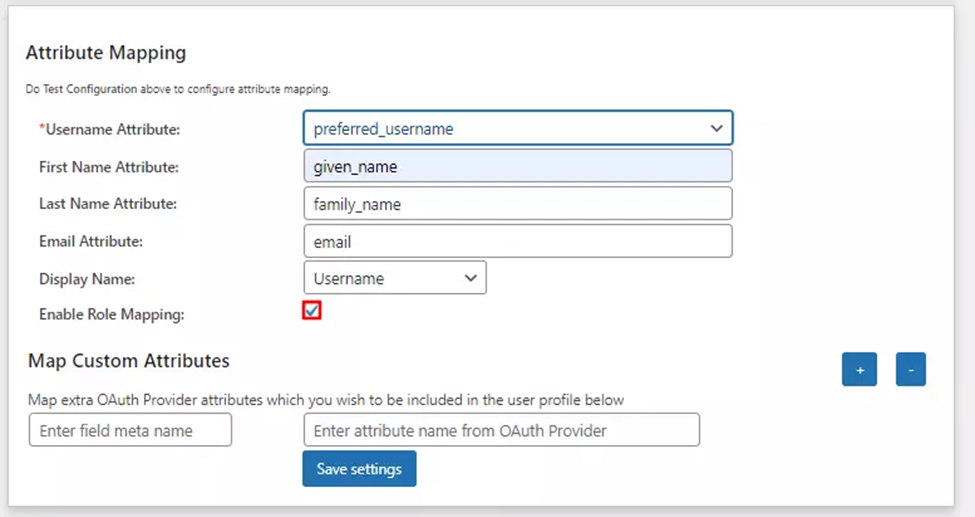
5. Enable Role Mapping: To enable Role Mapping, you need to map Group Name Attribute. Select the attribute name from the list of attributes which returns the roles from your provider application.
Eg: Groups
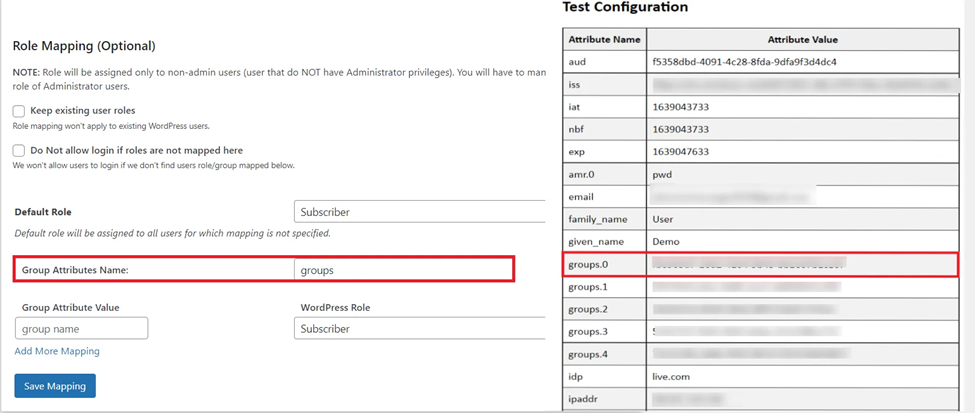
Assign WordPress role to the Provider role: Based on your provider application, you can allocate the WordPress role to your provider roles. It can be a student, teacher, administrator or any other depending on your application. Add the provider roles under Group Attribute Value and assign the required WordPress role in front of it under WordPress Role.
For example, in the below image. Teacher has been assigned the role of Administrator & the Student is assigned the role of Subscriber.
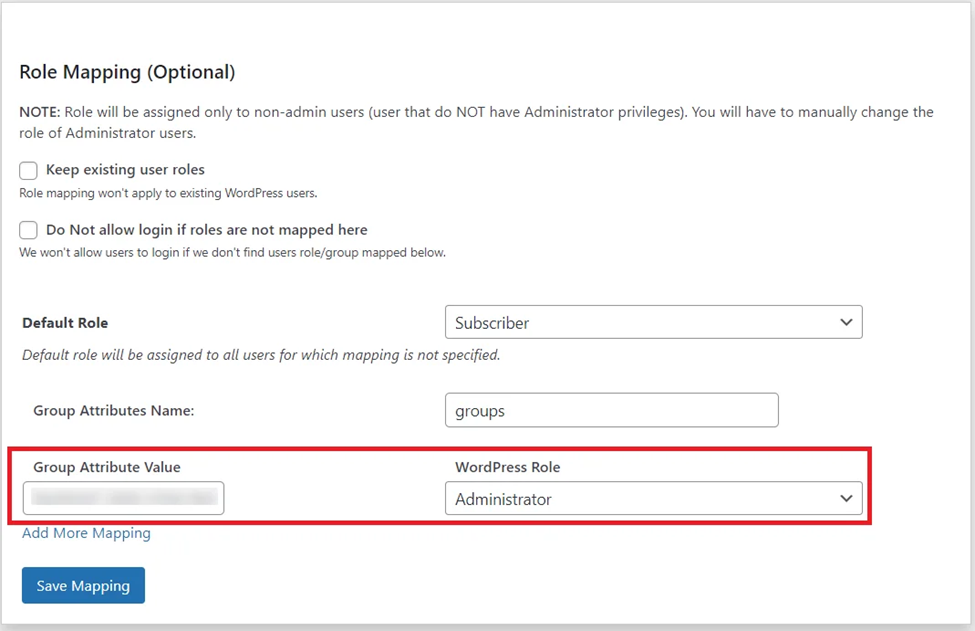
- Once you save the mapping, the provider role will be assigned the WordPress administrator role after SSO.
Example: As per the given example, Users with role ‘teacher’ will be added as Administrator in WordPress and ‘student’ will be added as Subscriber.
6. Custom Attribute Mapping [Premium]
- Go to your application in Azure Active Directory and select Token configuration from the left menu.
- Click on Add optional claim and then select ID from the right section.
- Now choose all the attributes you want to fetch while SSO (e.g family_name, given_name, etc) and click on Add button.
- You might see a popup to Turn on the Microsoft Graph profile permission (required for claims to appear in token), enable it, and click on Add button.

7. Sign In Settings
- The settings in Single Sign-On (SSO) Settings tab define the user experience for Single Sign-On (SSO). To add an Azure AD login widget on your WordPress page, you need to follow the below steps.
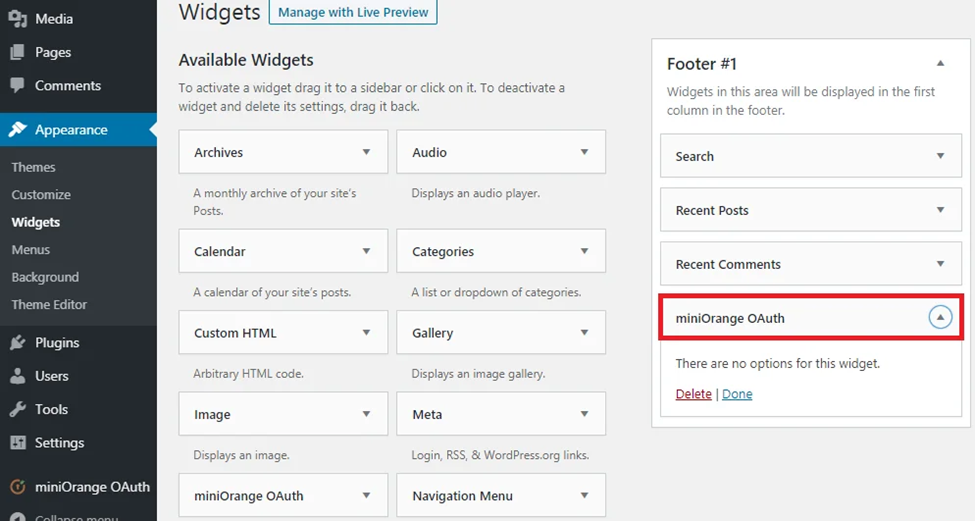
- 1. Sign in settings for WordPress 5.7 and before :
- Go to WordPress Left Panel > Appearances > Widgets.
- Select miniOrange OAuth. Drag and drop to your favourite location and save.
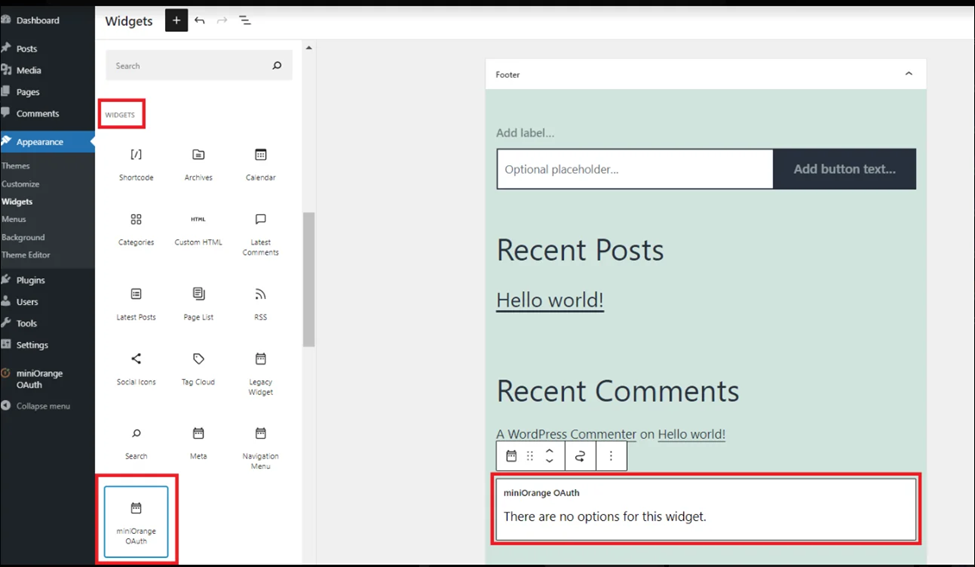
2. Sign in settings for WordPress 5.8 :
- Go to WordPress Left Panel > Appearances > Widgets.
- Select miniOrange OAuth. Drag and drop to your favourite location and save.
Open your WordPress page and you can see the Azure AD SSO login button there. You can test the Azure AD Single Sign-On (SSO) now.
6: Scope & Endpoints
Please refer the below table for configuring the scope & endpoints for Azure AD in the plugin.
| Scope: | openid |
| Authorize Endpoint: | https://login.microsoftonline.com/<tenant-id>/oauth2/authorize |
| Access Token Endpoint: | https://login.microsoftonline.com/<tenant-id>/oauth2/token |
| Get User Info Endpoint: | https://login.windows.net/common/openid/userinfo |
| Custom redirect URL after logout:[optional] | https://login.microsoftonline.com/common/oauth2/logout?post_logout_rediret-uri=<your URL> |
In this Guide, you have successfully configured Azure AD Single Sign-On (SSO) by configuring Azure AD as OAuth Provider and WordPress as OAuth Client using our WP OAuth Single Sign-On ( OAuth & OpenID Connect Client ) plugin. This solution ensures that you are ready to roll out secure access to your WordPress site using Azure AD login credentials within minutes.
Further Reading
- Download the OAuth Client SSO Plugin for WordPress Single Sign-On
- How to configure OAuth SSO with any OAuth/OpenID Provider?
- What all LMS are supported by OAuth SSO Plugin?
- Reach out to miniOrange for a demo or in case you have any queries or custom requirements
- Want to know more about miniOrange?
This article was a guest article from our friends at miniOrange.