A very frequent request from developers is to grant access to a SharePoint site from a service principal. This is how we typically do this, using an app registration along with sites.selected API permission.
The Sites.Selected permission in Microsoft Graph provides several benefits when it comes to controlling app-specific access to specific SharePoint sites:
- Granular Access Control:
- Using Sites.Selected along with the Sites permissions endpoint in Microsoft Graph allows you to set specific site collections and access levels for individual applications.
- Instead of granting broad access to an entire tenant, you can now precisely define which sites an application can interact with.
- Application-Specific Permissions:
- With Sites.Selected, you can assign read or write permissions to targeted sites for a specific application.
- This is especially useful when you want to manage sites using Graph or SharePoint APIs (such as CSOM or REST) for a particular application.
- Background Application Scenarios:
- Sites.Selected permissions are perfect for running applications in the background.
- For example, you might have an automated process that needs to interact with specific SharePoint sites without requiring user interaction.
I do this using PowerShell and it’s pretty easy to do once you have set it up once.
Process Summary
- Create an app reg for the developer requesting the site. They will use this for their app.
- Get the SharePoint site ID of the site they need to work with.
- Create an app registration for PowerShell with Sites.FullControl.All permission
- Connect the MgGraph PowerShell using the app reg and certificate
- Add the permission for the app
Create the Target app registration
This will be the app reg that the developer or app users.
- Add the permission for the app
- Create a new app registration in Entra ID.
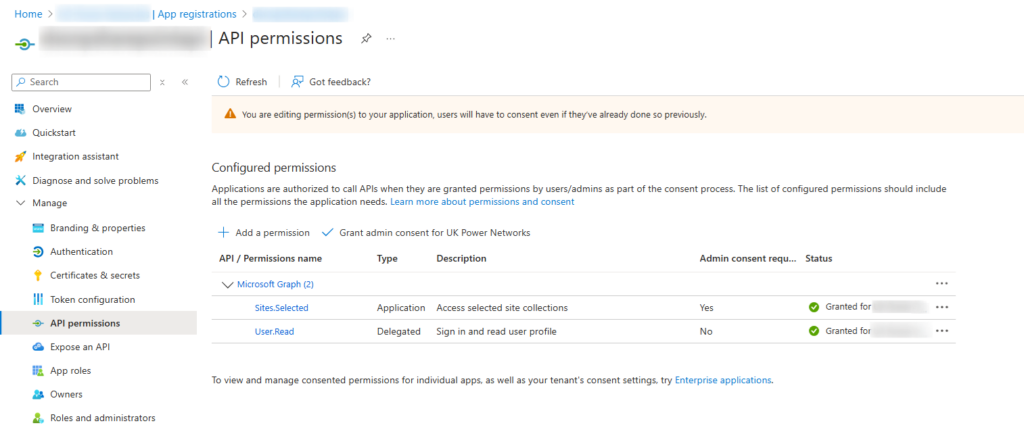
- Add API permissions: Graph API > Graph > Application > Sites.Selected
- After adding the permissions, click “Grant admin consent .
Note that Sites.Read.All is not required and should not be added, since this gives read access to all sites.
- Get the SharePoint site ID of the target site manually
This step is not required if using the full script below, since I now get the site ID using Graph.
Using Graph Explorer to find the site ID, or you could use PowerShell with e.g. Get-MgSite -SiteId. Note: Add yourself to site Admin in SharePoint admin centre otherwise this won’t work.
- Login at https://developer.microsoft.com/en-us/graph/graph-explorer
- Run the following GET query e.g.
https://graph.microsoft.com/v1.0/sites/{tenantname}.sharepoint.com:/sites/{sitename}
Note the complete id in response.
Note that Sitename is not the sitetitle (which may contain spaces), sitename is the last part of the site URL after sites/
e.g. https://graph.microsoft.com/v1.0/sites/tenant.sharepoint.com:/sites/sitename
Create an app registration for Graph PowerShell with sites selected permission
Create an app registration for Graph PowerShell if you don’t already have one.
First, create a local certificate:
$CertParam = @{
    'KeyAlgorithm'      = 'RSA'
    'KeyLength'         = 2048
    'KeyExportPolicy'   = 'NonExportable'
    'DnsName'           = 'powershell.domain.com'
    'FriendlyName'      = 'Graph PowerShell app'
    'CertStoreLocation' = 'Cert:\CurrentUser\My\'
    'NotAfter'          = (Get-Date).AddYears(2)
}
$Cert = New-SelfSignedCertificate @CertParam
Export-Certificate -Cert $Cert -FilePath c:\temp\GraphPowerShellApp.cer- Create a new App registration called e.g. Graph PowerShell
- In the app registration:
- Navigate to Certificates & secrets
- Click the certificates tab
- Click Upload certificate
- Click the folder icon and browse to your desktop to select the exported cert
- Click Add
- Add Microsoft.Graph Sites.FullControl.All application permission
Connect to Graph using PowerShell with the app registration and certificate
You can’t just connect to Graph by logging in, since you need to use the app with the correct permissions in order to add the sites.selected permission.
It’s best to do this with a certificate rather than secret, since we don’t want to use a secret value in plain text.
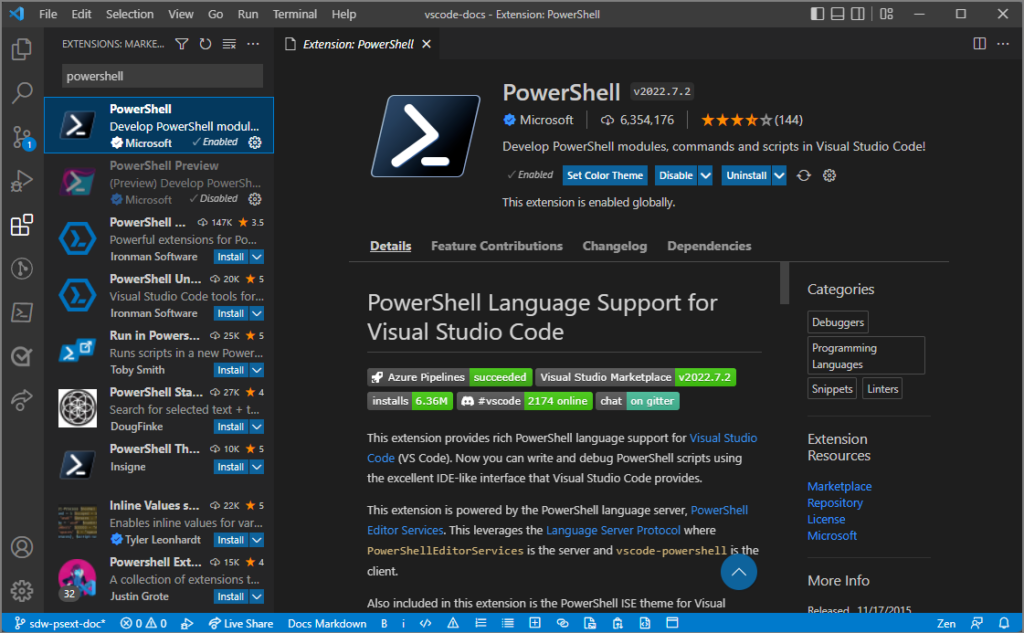
Install or update the Microsoft.Graph PowerShell module:
find-module -Name Microsoft.Graph # Check the latest version
get-module -ListAvailable -name microsoft.graph # Check what version you have
uninstall-module -Name Microsoft.Graph # Uninstall any versions (run multiple times if necessary)
Install-Module Microsoft.Graph -Scope Currentuser # Install latest
Connect to Graph using the app registration and certificate:
$AppId = "xxxxxxx-b9e8-4d24-a065-xxxxxxxxxx" # Graph PowerShell
$TenantId = "xxxxxx-e092-45fe-92c8-xxxxxxxxxx"

# Find the cert ID Get-ChildItem Cert:\CurrentUser\My\
$Certificate = Get-ChildItem Cert:\CurrentUser\My\DJER4I6FMC65M52E2KA5SKSDKF
Connect-MgGraph -TenantId $TenantId -AppId $AppId -Certificate $Certificate
Add the permission for the app
# Import-Module Microsoft.Graph.Sites
# Connect to Graph Powershell using the app reg, could use either certificate or secret
Run the PowerShell to add the permission (change wite to read if only read is required).
$siteId = "tenant.sharepoint.com,xxxxxx-6710-417e-bd83-xxxxx,xxxxxx-b61c-49dd-af50-xxxxx"

$params = @{
    roles = @(
    "write"
)
grantedToIdentities = @(
    @{
        application = @{
            id = "xxxxxxx-c3c4-46e4-9480-xxxxxxxx" # Target Application’s Client Id
            displayName = "AppRegName" # Target Application’s Display name
        }
    }
)

}

New-MgSitePermission -SiteId $siteId -BodyParameter $params
Or the full script which also gets the Site ID:
# Connect to Graph
."$PSScriptRoot\..\Connections\ConnectMgGraph.ps1"
# Connect to Graph Powershell using the app reg, could use either certificate or secret e.g. Connect-MgGraph -TenantId $TenantId -AppId $AppId -Certificate $Certificate

$siteURL = "https://tenant.sharepoint.com/sites/sitename" # don't include HTTPS

# Remove https
$siteFix = $siteURL -replace "https://", ""

# Add the colon after the domain
$siteFix = $siteFix -replace "sharepoint.com", "sharepoint.com:"

# Get the site id using a Graph query
try {
	$Site = Get-MgSite -siteId $siteFix
}
catch {
	write-host "Site not found" -ForegroundColor Red
	Exit
}
$siteId = $Site.Id
write-host "Found site: $($Site.DisplayName) $($Site.WebUrl)" -ForegroundColor Green

$params = @{
	roles = @(
	"write"
)
grantedToIdentities = @(
	@{
		application = @{
            id = "xxxxxxx-c3c4-46e4-9480-xxxxxxxx" # Target Application’s Client Id
            displayName = "AppRegName" # Target Application’s Display name
		}
	}
)
}

New-MgSitePermission -SiteId $siteId -BodyParameter $params
Conclusion
In summary, Sites.Selected provides fine-grained control over which sites an application can access, allowing you to tailor permissions to your specific use case. It’s easy to user PowerShell and Microsoft Graph to add this.
In the future we might create a Blazor app to easily do this using a GUI, not that it’s difficult once you have a script.
See https://techcommunity.microsoft.com/blog/spblog/develop-applications-that-use-sites-selected-permissions-for-spo-sites-/3790476 for the official Microsoft blog post on this subject.