How to secure and manage Azure app consent to make things easier for both users and admins. When first connecting an app to a Microsoft 365/Azure tenant, the requester is prompted to review the permissions and approve the app. If left open, this can be used maliciously (especially since no one reads the permissions). By default the Azure AD app consent configuration is not secure so it’s recommend to make some changes as documented here.
This article walks you through the recommended settings, as well as how to configure admin consent to suit your environment.
I have seen it recommended that you should disable user consent and then enable admin consent requests as a one size fits all approach. This approach is only suitable for small to mid-size organisations with a permanent IT presence who can respond to the requests. If you configure like this in a large organisation, you will likely be bombarded with requests for access to apps that either you want to disable across the board, and so don’t want to have to respond to every request, or you want to allow the app company wide.
So this article addresses different requirements and scenarios.
Default user consent settings
The default setting is strangely not the one that Microsoft recommend, and allows any user to consent to any app permissions. As per the Microsoft article here:
‘To reduce the risk of malicious applications attempting to trick users into granting them access to your organization’s data, we recommend that you allow user consent only for applications that have been published by a verified publisher.’
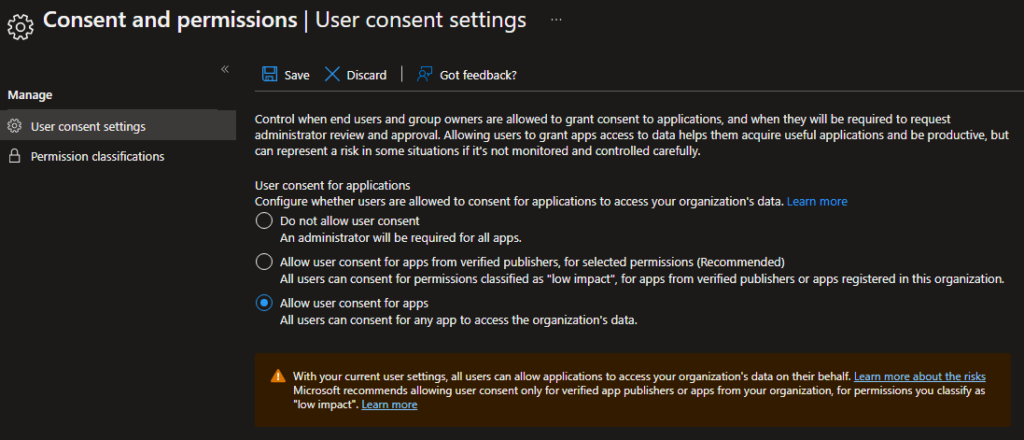
So firstly I would recommend that you disable this setting to the more reasonable middle setting:
- Open https://portal.azure.com > Azure Active Directory.
- Enterprise applications > Consent and permissions > User consent settings.
- Select ‘Allow user consent for apps from verified publishers’, then save.
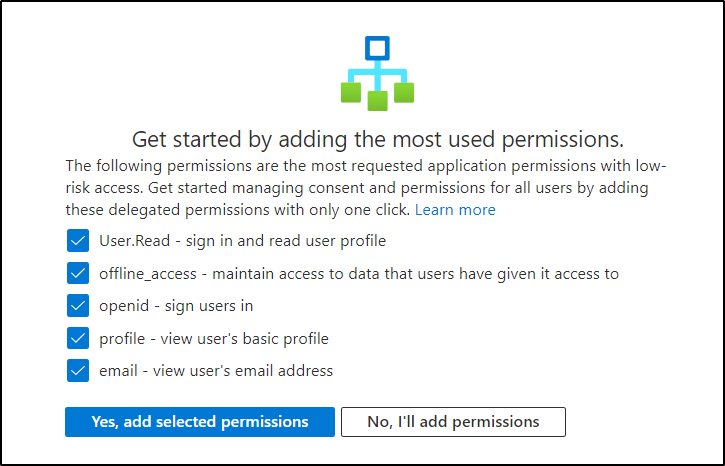
- Click on the link ‘Select permissions to classify as low impact’.
- If you are OK with the suggestions at the bottom, you can enable apps which need low risk permissions.
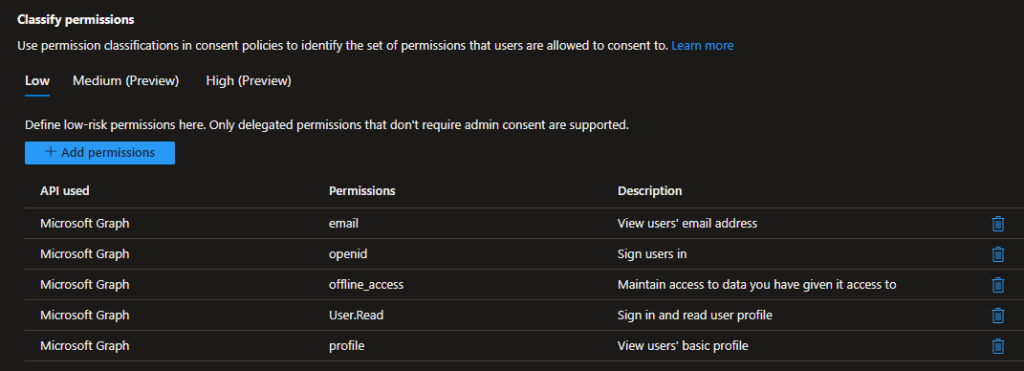
These are Microsoft Graph permissions if you need to add them manually or don’t see the above screen:
Admin Consent Request options
Now that you have limited the risk of users approving potentially intrusive apps, you can also control whether or not they can request approval from an admin for apps which need more than the permissions above.
There are two approaches:
- Enable admin consent requests. Users trying to use a new app will be able to request that an admin reviews their request and consents to the app permissions on their behalf.
- Disable admin consent requests. Users will simply be denied access and unable to request admin consent.
Enabling admin consent requests
Admin consent requests are disabled by default. In a mid size organization it may be a good idea to enable this. It will give you an idea of what web or mobile applications your users are trying to access, and allow you to review and approve as required.
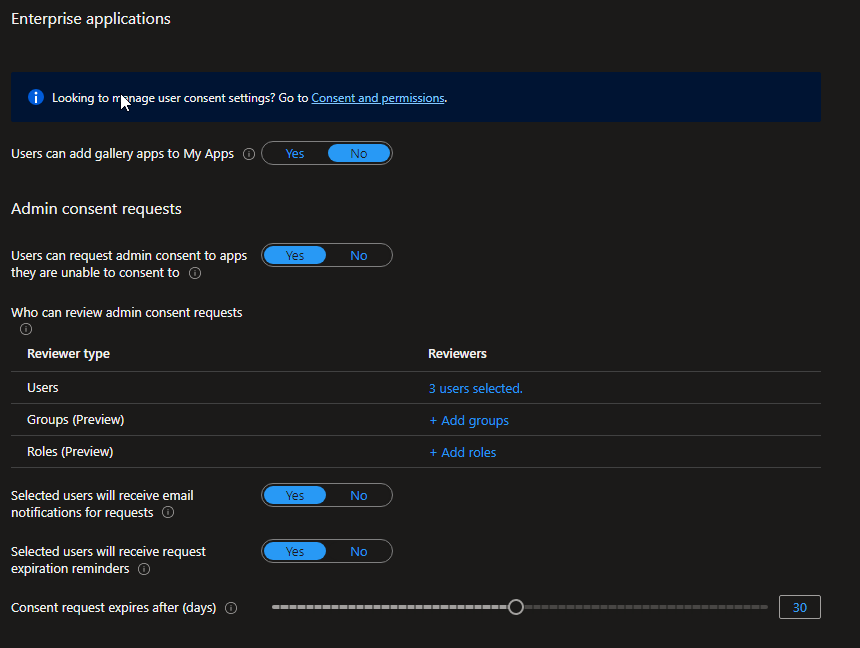
- As a Global Admin open Azure AD > Enterprise applications
- Select User settings > Admin consent requests, select Yes for ‘Users can request admin consent to apps they are unable to consent to’.
- Then select users or groups who will review the access requests.
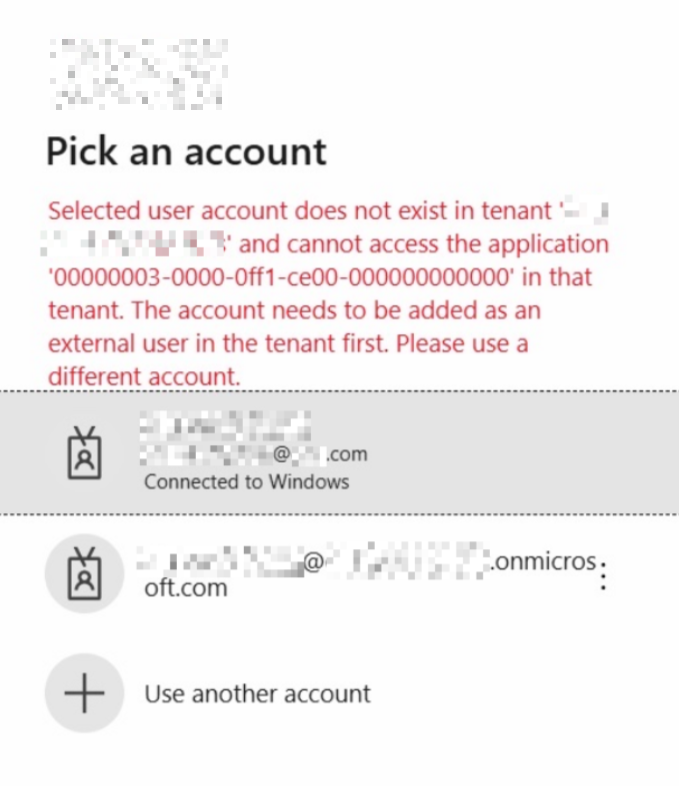
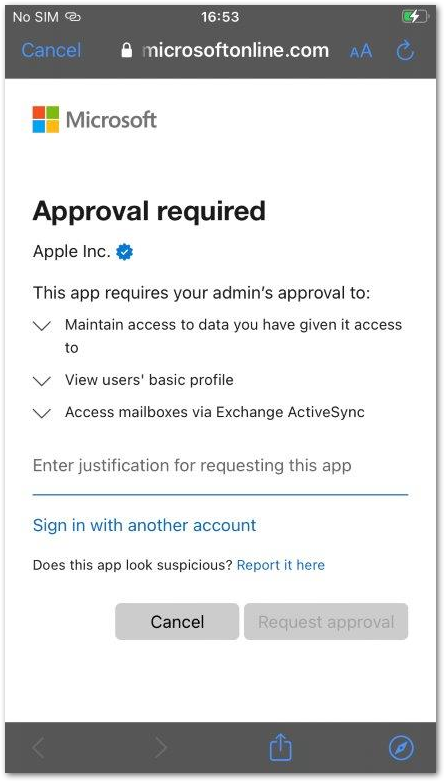
This is what users will see if trying to access an app which has not already been approved or needs more permissions than they can grant:
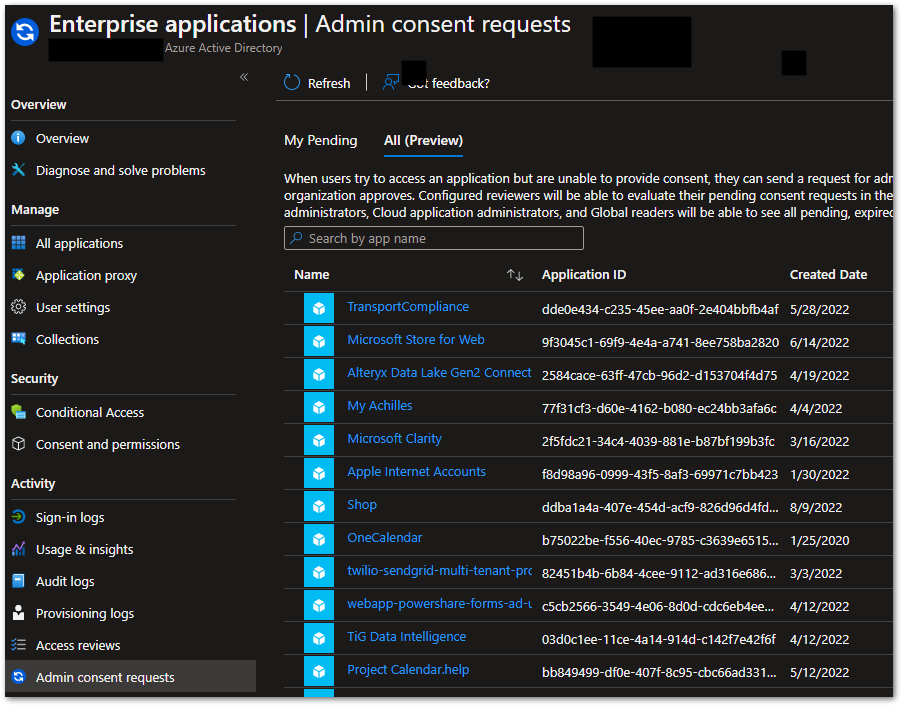
Admins will then get an email and can approve apps in Enterprise applications > Admin consent requests. There can end up being a lot of nonsense in here!
Disabling admin consent requests
In a larger organisation however, admin consents can become unmanageable, with users requesting all sort of apps, most of which are not relevant. This quickly becomes an admin overhead you could probably do without. I would therefore recommend not enabling this, but disabling admin consent requests, and then consenting to specific applications on behalf of your users.
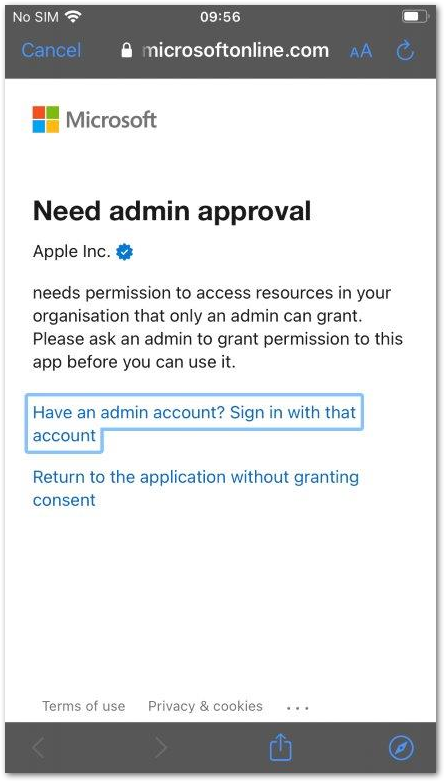
With consent disabled, users are unable to use the app or request approval:
Note: you should assign developers the Application Developer role so that they can still register their own applications.
Consenting to applications on behalf of users
If you don’t want users to have to request admin consent, or have turned off admin consent requests and want to manually approve an app for some or all users, you can add an app and approve it as an admin.
A common example is ‘Apple Internet Accounts’ which was previously called ‘iOS accounts’ and will still have that name in Enterprise Apps if previously allowed (the application ID is the same either way). This is the iOS native Mail app, and whilst can’t be properly secure by Intune (since it does not support Intune APIs), it is often allowed.
Note: I would not recommend this, instead get your users to use Outlook which is more secure and has better support for Exchange Online! But some VIP users insist…
First, you need to get the app to show in Azure AD Enterprise apps. It may be in one of three places:
- Already in Enterprise apps, if someone has approved it.
- In Enterprise apps > Admin consent reviews, if someone has requested but has not been reviewed.
- Neither of these, in which case you need to add it by trying to sign in to the app.
Add the Enterprise App
Add the app to Azure AD Enterprise applications either by approving an existing requests, or if you don’t want to do that or it isn’t there, deny any requests and then try and sign into the app with a Global admin account. This will work even if admin consent requests are denied:

You can add the app for everyone by choosing ‘Consent on behalf of your organization’, or just yourself.
You could also do this by requesting an app with admin consent requests turned on, then go and approve the request which will approve it for the whole org.
Consenting to the app
If you don’t tick the consent box above, you can approve the app for everyone later:
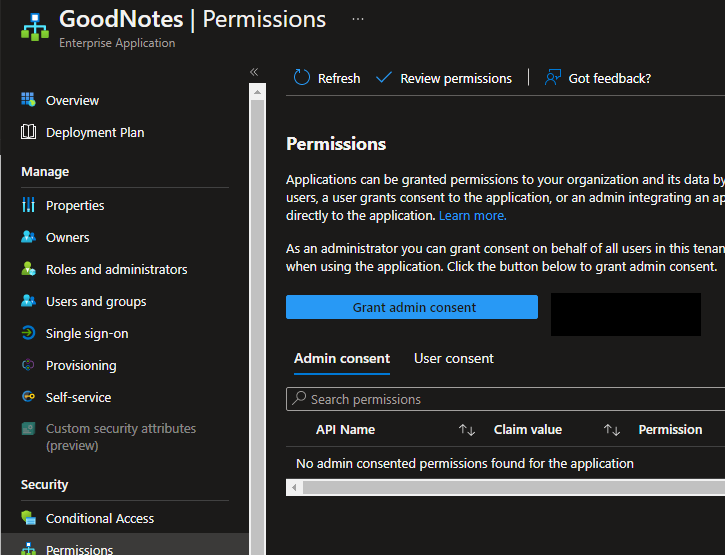
- Open the app.
- Click on Permissions.
- Click the ‘Grant admin consent..’ button, which will show the consent screen.
Limiting access to an app
Another common requirement is to allow the app, but only for a defined subset of users. This is straightforward, just use the way you would normally limit access to an app:
- Add and approve the app for everyone.
- Open Enterprise applications > All applications.
- Open the app and select Properties.
- Select Assignment required? To Yes.
- On Users and groups, add users and groups as required.
Deleting apps
Note that if you don’t want an app there and delete it, you can always add it back again by just trying to connect the same app again. E.g. If you deleted Apple Internet Accounts, you can delete it and then try and sign in again on an iOS device using the mail app.
Also, if you delete an app that is in use, access will immediately be revoked and stop working for anyone using the app.