A simple way for your users to manage distribution list membership with hybrid Office 365 environments with Active Directory on-premises, Azure AD Connect synced to Azure AD and Exchange Online.
With Exchange on-premises, users may be used to managing Distribution Lists (DLs), using Outlook to open the DL and edit the group membership that they are the owners of. However, once you move to Exchange Online, these can no longer be managed using Outlook, since the DL is synced from your on-premises AD, and cannot be edited in Azure AD. So, the DL has to be managed in your on-premises AD. Your help desk can do this with Exchange Admin tools, however, it is not very convenient for users to have to call the help desk every time that they want to edit DL membership.
The issue is documented here: https://support.microsoft.com/en-gb/help/2417592/owners-of-an-on-premises-distribution-group-that-s-synced-to-office-36, however, Microsoft do not offer any solutions. This is a workaround we use to enable your users to manage DL membership with no special tools, in a manner which is easy to use.
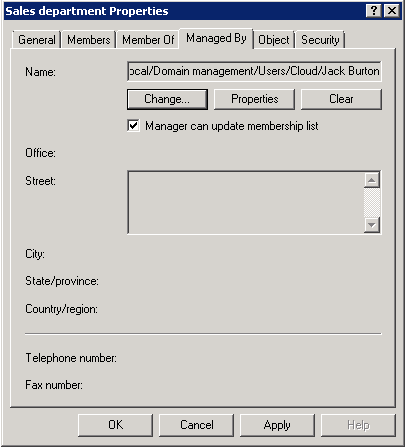
Edit your DLs to make them manageable
First, you need to make sure that your DLs are editable by the owners. Check the box below, or do this using PowerShell e.g. https://shirl9141.wordpress.com/2012/08/03/active-directory-manager-can-update-membership-list-powershell/
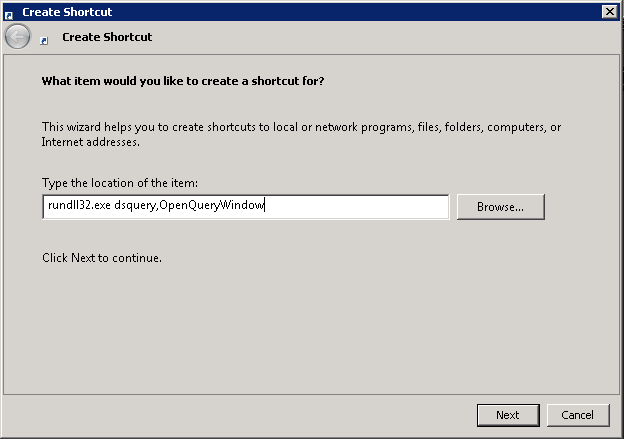
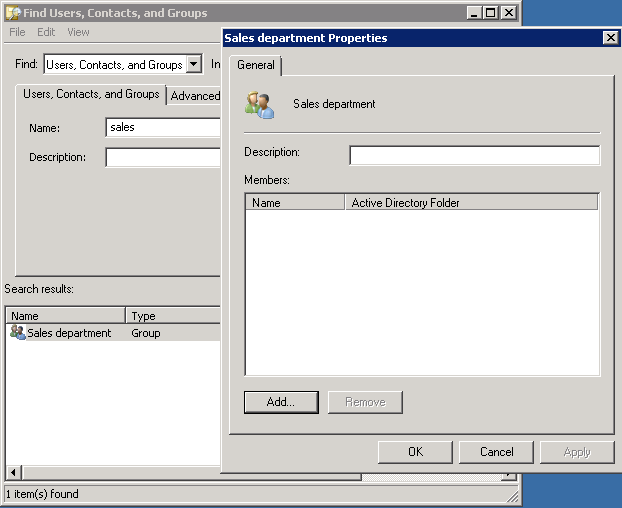
Create a shortcut to Search Active Directory
This works on any Windows machine, and you do not need any AD tools installed.
- Right click on your desktop or in a folder
- Choose Create new shortcut
- Enter rundll32.exe dsquery,OpenQueryWindow as the location
- You could also add an icon from %systemroot%\system32\imageres.dll or %systemroot%\system32\shell32.dll
Now just run your shortcut, and if you are the owner you can edit the DL membership. You could also deploy the shortcut via SCCM or GPO to make this easy for users. You can also find this via the
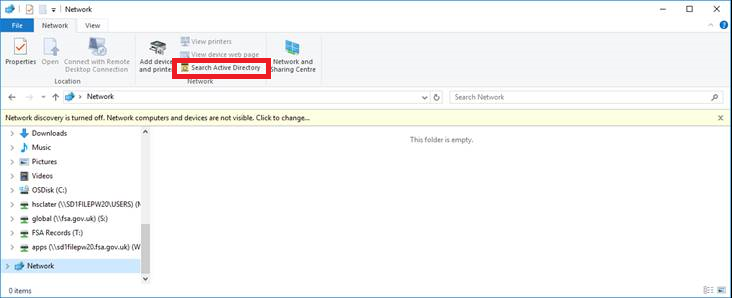
Note that you can also do this as follows, but this is less than ideal and will usually result in an error when selecting the Network in Windows Explorer:
· Open Windows Explorer.
· Click Network in the bottom left, and press OK to the error message that pops up
· Click Search Active Directory at the top